How to install a Printer on Mac Print with Ease Today
Published: 4 May 2025
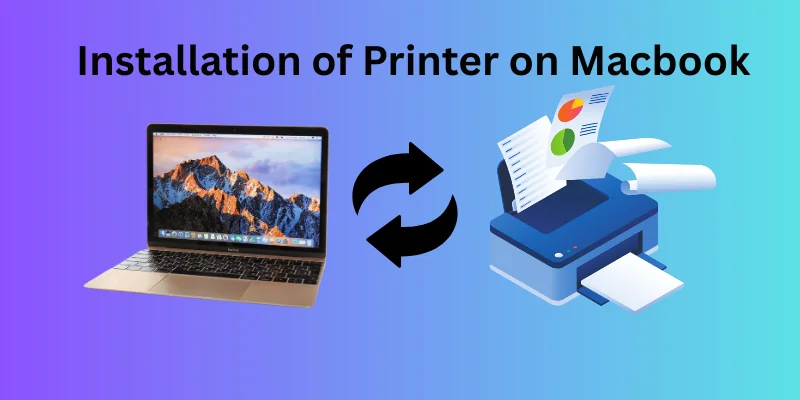
Setting up a printer on a Mac might sound complicated, but it’s actually quite simple! Whether you have a wired or wireless printer, macOS makes the installation process smooth and easy. Did you know that most Mac printers install themselves automatically? That’s right, macOS is designed to detect and set up printers with minimal effort. But sometimes, things don’t go as planned, and you’re left wondering what went wrong. I’ve got you covered. Follow this simple guide of How to install a printer on mac.
1. Checking Printer Compatibility
Before starting, let’s make sure your Printer is compatible with macOS.
- Check the manufacturer’s website: Brands like HP, Canon, Epson, and Brother list compatible macOS versions.
- Look for AirPrint support: If your printer supports AirPrint, it works with macOS without extra drivers.
- Check for macOS updates: Sometimes, older macOS versions might not support newer printers. Go to System Settings > General > Software Update to check.
If your printer is too old, you may need to download drivers or use third-party software like Gutenprint.
2. Connecting the Printer to Mac
Now, let’s connect your printer to your Mac. Follow the method that applies to you:
1. Connecting a Wireless Printer
1. Turn on your printer and make sure it’s in setup mode (check the manual if unsure).
2. Connect it to Wi-Fi:
- If your printer has a screen, go to Settings > Wi-Fi and select your network.
- If not, use the printer’s mobile app (e.g., HP Smart, Canon Print) to connect it.
3. On your Mac, go to System Settings > Printers & Scanners.
4. Click the Add Printer button and select your printer from the list.
5. Click Add, and your printer is now ready to use!
Tip: If your printer doesn’t show up, restart both the printer and Mac, then try again.
2. Connecting a Wired Printer (USB or Ethernet)
1. Turn on your printer and plug it into your Mac using a USB cable or connect it to the same network via Ethernet.
2. macOS should automatically detect the printer and install drivers.
3. If nothing happens, go to System Settings > Printers & Scanners and click Add Printer.
4. Select your printer and click Add. Your printer is now set up!
Tip: If you’re using a USB-C Mac, you may need a USB-to-USB-C adapter to connect your printer.
3. Adding the Printer in System Settings
1. Once your printer is connected, follow these steps to add it manually if needed:
2. Open System Settings on your Mac.
3. Click Printers & Scanners in the left sidebar.
4. Click the + (Add Printer, Scanner, or Fax) button.
5. A list of available printers will appear, select your printer.
6. Click Add, and you’re done!
Tip: If you see multiple versions of your printer, choose AirPrint or the latest driver option.
4. Installing Printer Drivers (If Needed)
Sometimes, your printer may need additional drivers to function correctly. Here’s how to install them:
1. Visit the printer manufacturer’s website (HP, Canon, Epson, Brother, etc.).
2. Search for your printer model and download the latest macOS drivers.
3. Open the downloaded file and follow the installation instructions.
4. Restart your Mac to apply the changes.
Tip: If macOS can’t find drivers, try using Gutenprint, a third-party printer driver for older models.
5. Setting Up Printer Preferences
Now that your printer is installed, let’s customize its settings:
1. Go to System Settings > Printers & Scanners.
2. Select your printer and click Options & Supplies.
3. Adjust settings like default paper size, print quality, and color preferences.
4. To set it as your default printer, click Set as Default Printer.
5. Print a test page to ensure everything is working.
Tip: Printing in black & white instead of color can save ink!
6. Troubleshooting Common Issues
Even with a smooth setup, you might run into issues. Here’s how to fix them:
- Printer not showing up? Restart your printer and Mac, then reconnect.
- Print job stuck in queue? Go to System Settings > Printers & Scanners, select your printer, and click Open Print Queue > Cancel All Jobs.
- Wi-Fi printer not connecting? Ensure both devices are on the same Wi-Fi network, and try reconnecting.
- Poor print quality? Clean the print heads (check the printer manual) and ensure you have enough ink or toner.
Tip: If nothing works, try removing the printer and adding it again!
Your Mac might not detect the printer if it’s not connected properly. For wired printers, check the USB or cable connection. For wireless ones, ensure both your Mac and printer are on the same Wi-Fi network.
Most modern printers install automatically on macOS. However, some printers may require drivers, which you can download from the manufacturer’s website. Check System Settings > Printers & Scanners to see if your printer needs additional software.
First, connect your printer to Wi-Fi using its display screen or manufacturer’s app. Then, go to System Settings > Printers & Scanners and click Add Printer. Select your printer from the list and follow the on-screen steps.
Yes! You can connect a wired printer using a USB cable. If your printer supports AirPrint, you can also print without installing extra software.
Check if the printer has paper and ink, then restart both the Mac and printer. Go to System Settings > Printers & Scanners and ensure the correct printer is selected. If print jobs are stuck, try clearing the print queue.
Go to System Settings > Printers & Scanners and select your printer. Click Set as Default Printer to make it the default choice. This ensures all documents print from the same device unless changed manually.
Yes, if your printer supports AirPrint, you can print directly from your iPhone or iPad. Simply select Print from the share menu and choose your printer. Make sure your Apple device and printer are connected to the same Wi-Fi network.
Some older printers may not be compatible with newer macOS versions. Try downloading third-party drivers like Gutenprint or checking if the manufacturer provides an alternative driver. If nothing works, consider upgrading to a newer AirPrint-compatible printer.
Go to System Settings > Printers & Scanners, select your printer, and click Remove Printer. This will delete it from your Mac’s system. You can always re-add it later if needed.
A printer can go offline due to network issues, outdated drivers, or power-saving settings. Restart your printer and check if it’s connected to the same Wi-Fi as your Mac. If the problem continues, try resetting the printer settings and reconnecting it.
Conclusion
So guys, in this article, we’ve covered how to install a printer on Mac in detail. Hopefully, your printer is now set up and ready to go! If you’re still having trouble, I recommend restarting both your Mac and printer, it fixes most issues. Now, it’s your turn! Try setting up your printer and let me know in the comments if everything worked smoothly. And if you know someone struggling with their printer, be a hero and share this guide with them!

- Be Respectful
- Stay Relevant
- Stay Positive
- True Feedback
- Encourage Discussion
- Avoid Spamming
- No Fake News
- Don't Copy-Paste
- No Personal Attacks
- Be Respectful
- Stay Relevant
- Stay Positive
- True Feedback
- Encourage Discussion
- Avoid Spamming
- No Fake News
- Don't Copy-Paste
- No Personal Attacks
